Many content editors have a preference for using the experience editor (or page editor) to edit the Sitecore content. Much like the content editor it is possible to add your own buttons to the ribbon at the top, it's just done in a different way. In this example I am working with Sitecore 8.
Then we need to register this inside App_Config/Include/Sitecore.ExperienceEditor.Speak.Requests.config.
Now inside Website\sitecore\shell\client\Sitecore\ExperienceEditor\Commands we create a JavaScript file MyCommand.js. This is the code which the button click will call.
Creating the button
- Open up the Sitecore desktop and load the content editor with the core database selected
- Navigate to "/sitecore/content/Applications/WebEdit/Ribbons/WebEdit/Page Editor" - it may have a display name of experience editor
- In my case I want the button to appear in the edit section, so under Edit I insert a large button (/sitecore/templates/System/Ribbon/Large Button)
- The Header field is required and contains the text that will display for the button
- The Icon field is required and will be the actual button
- The ID field is required and should be a unique id for the button
Creating the code
Firstly we need to create the code that will be run on the button click, this is a c# class.
namespace MyProject.Commands
{
    public class MyCommand : PipelineProcessorRequest<ItemContext>
    {
        public override PipelineProcessorResponseValue ProcessRequest()
        {
            Item item = base.RequestContext.Item; // The item being edited

            // Do code

            return new PipelineProcessorResponseValue
            {
                Value = "Return Value" // Return an object here on value
            };
        }
    }
}
Then we need to register this inside App_Config/Include/Sitecore.ExperienceEditor.Speak.Requests.config.
<request name="ExperienceEditor.MyCommand" type="MyProject.Commands.MyCommand, MyProject"/>
Now inside Website\sitecore\shell\client\Sitecore\ExperienceEditor\Commands we create a JavaScript file MyCommand.js. This is the code which the button click will call.
define(["sitecore"], function(Sitecore) {
    Sitecore.Commands.MyCommand = {
        canExecute: function(context) {
            // Determines whether command is disabled or enabled.
            return true;
        },
        execute: function(context) {
            Sitecore.ExperienceEditor.PipelinesUtil.generateRequestProcessor("ExperienceEditor.MyCommand", function(response) {
                // response.responseValue.value is the value passed back from the code
            }).execute(context);
        }
    };
});
The above JavaScript method uses canExecute to decide if the button is available for the given context/item and execute to run once the button is clicked.
Connecting the button
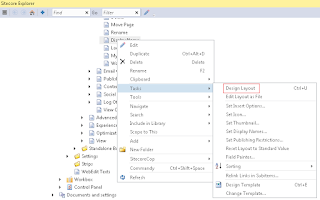
- Open up Sitecore rocks and locate the button just created (remembering it's in the core database)
- Right click the item and select Tasks > Design Layout
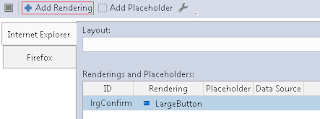
- Add a rendering and select Large Button
- Double click the newly added rendering to edit it's properties
- Id is required and should be a unique value (and different from the previous step)
- Click is required and should be set to "trigger:button:click"
- Command is required and should be the name of the command created earlier (MyCommand)
- PageCodeScriptFile is required and should be the location of the JavaScript file created earlier (/sitecore/shell/client/Sitecore/ExperienceEditor/Commands/MyCommand.js)
The button should now appear on the experience editor and run as expected! Remember you can secure the button via the item created in the core database if required.


